Integration Steps
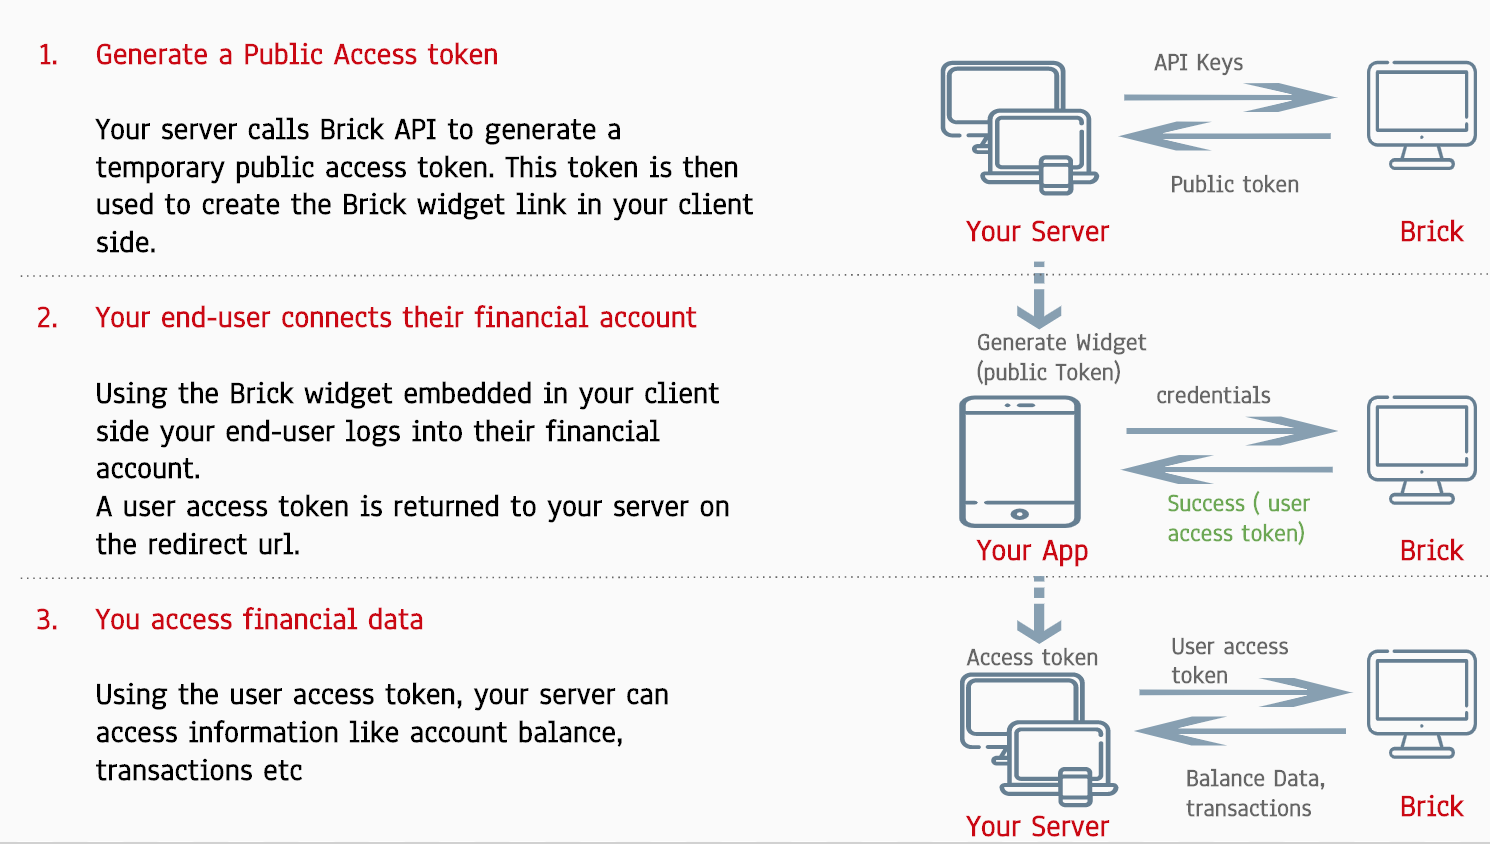
The end-to-end integration involves client-side and server-side configurations. Below is an overview of how you can create authentication links with the brick widget.

As you can see, your client-side and server-side will both be involved in the Brick widget flow.
Here is an end-to-end example to illustrate each side's responsibility:
- An end user clicks on a button to "Add a bank account"
- The client-side calls the server-side asking it to get a public_access_token
- The server-side calls Brick to get the public_access_token using your private API keys
- Brick returns a valid public_access_token to your server-side which is valid for 30 mins
- Your server returns the public_access_token to the client-side
- The client-side starts the widget using the public_access_token through a specific link format. Check out our Brick Widget for constructing the brick widget launch url.
- The end user navigates through the Brick widget and connect a valid accounts/institutions desired (Multiple accounts to be connected are allowed)
- Brick returns a response of the newly created user_access_tokens depending on the number of accounts/institutions connected via POSTing to the "redirect_url" parameter that you share via the Launch Widget link. Your server needs to host this redirect url as a REST api of POST type on the "redirect_url" endpoint ( Notes : If you are trying our v1 version of widget and wanting to redirect to your localhost environment, you will need to use tunneling methods such as ngrok or redirect to development environemnt directly )
- The client-side calls your server-side to pull first financial data from Brick
- The server-side calls Brick API to retrieve financial information using the user_access_token and the private API keys
- Brick returns the info to the server-side, which then sends the info to the client-side
- The end user sees its financial data within your service
Updated over 2 years ago
What’s Next
